- The Messages page allows you to submit annotations, and highlights available annotations with a dot indicator.
- The Logs page allows you to view and export annotations as columns.
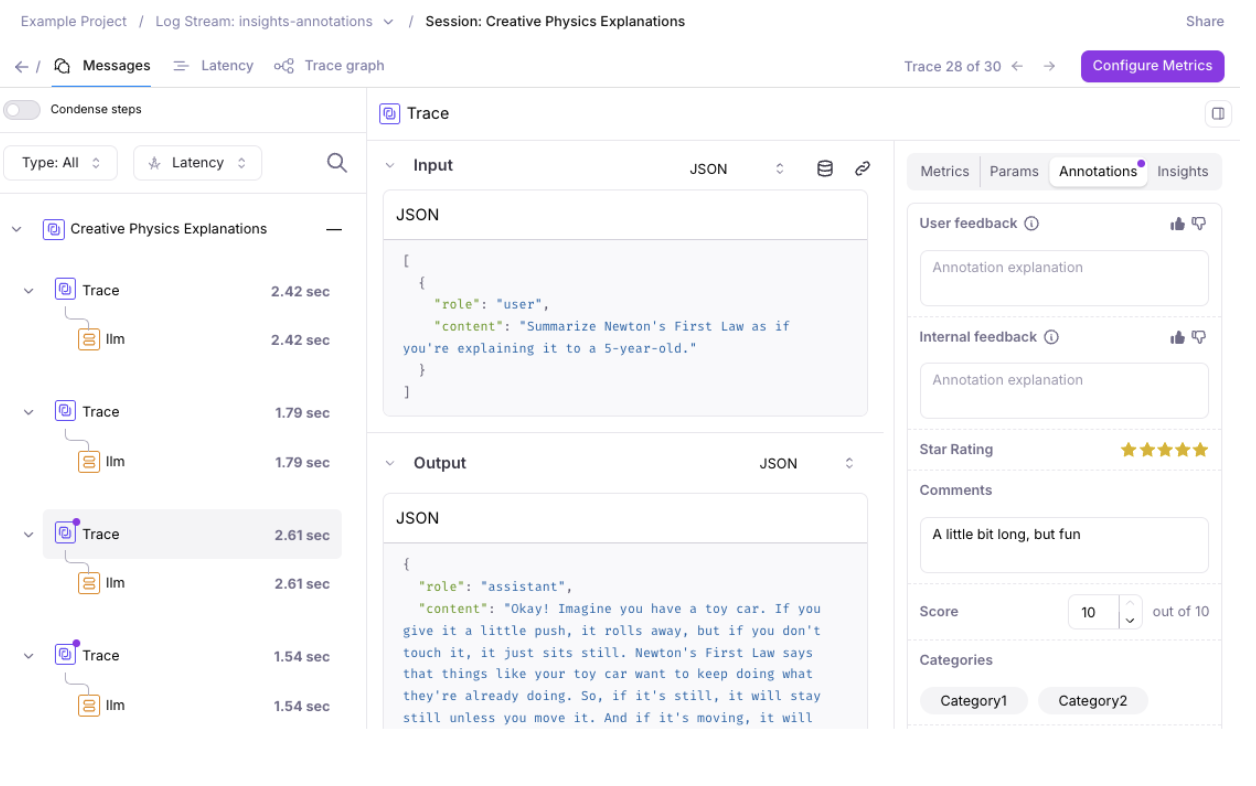
- Categories: Enable annotators to select one or more designated categories
- Score: Enable annotators to select a number between 0 and a max score
- Star: Enable annotators to rate from 1 to 5 stars
- Text: Enable annotators to provide freeform text
- Thumbs Up & Down: Enable annotators to rate a like or dislike