- The Messages page allows you to submit annotations, and highlights available annotations with a dot indicator.
- The Logs page allows you to view and export annotations as columns.
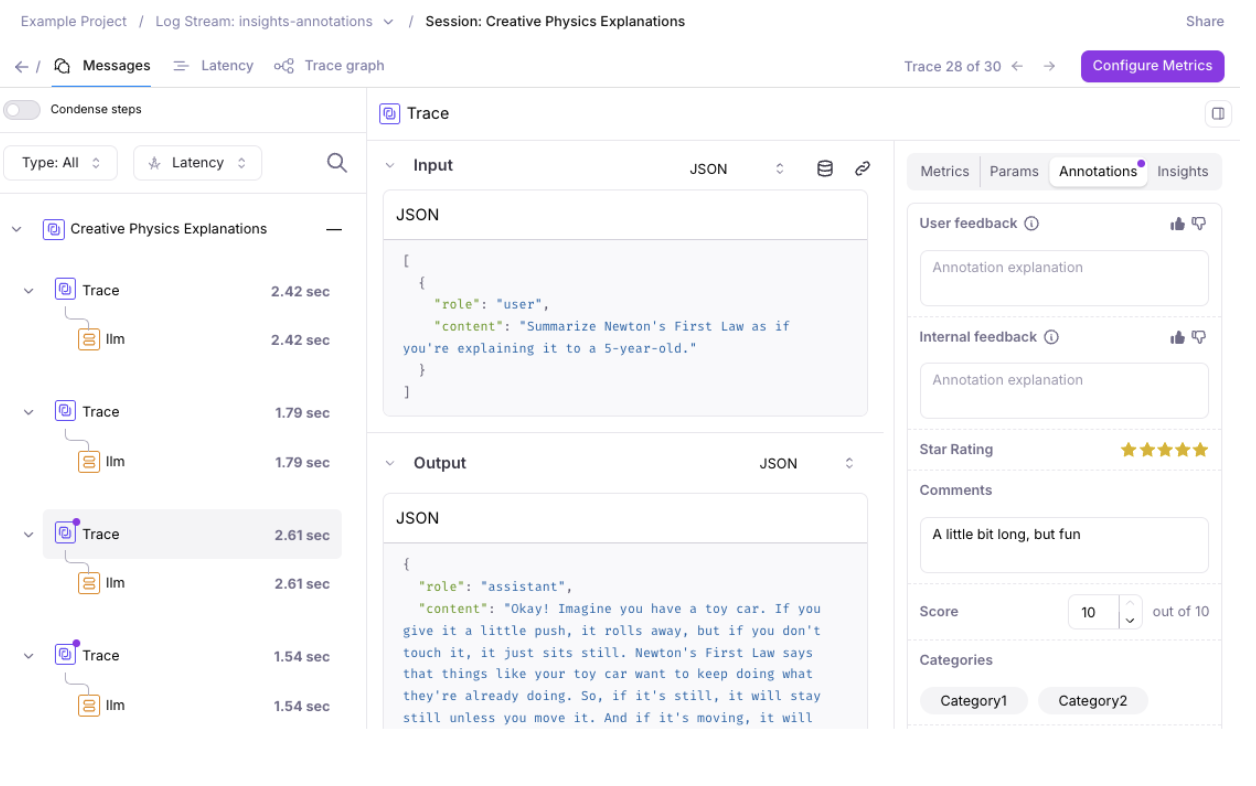
- Categories: Enable annotators to select one or more designated categories
- Score: Enable annotators to select a number between 0 and a max score
- Star: Enable annotators to rate from 1 to 5 stars
- Text: Enable annotators to provide freeform text
- Thumbs Up & Down: Enable annotators to rate a like or dislike
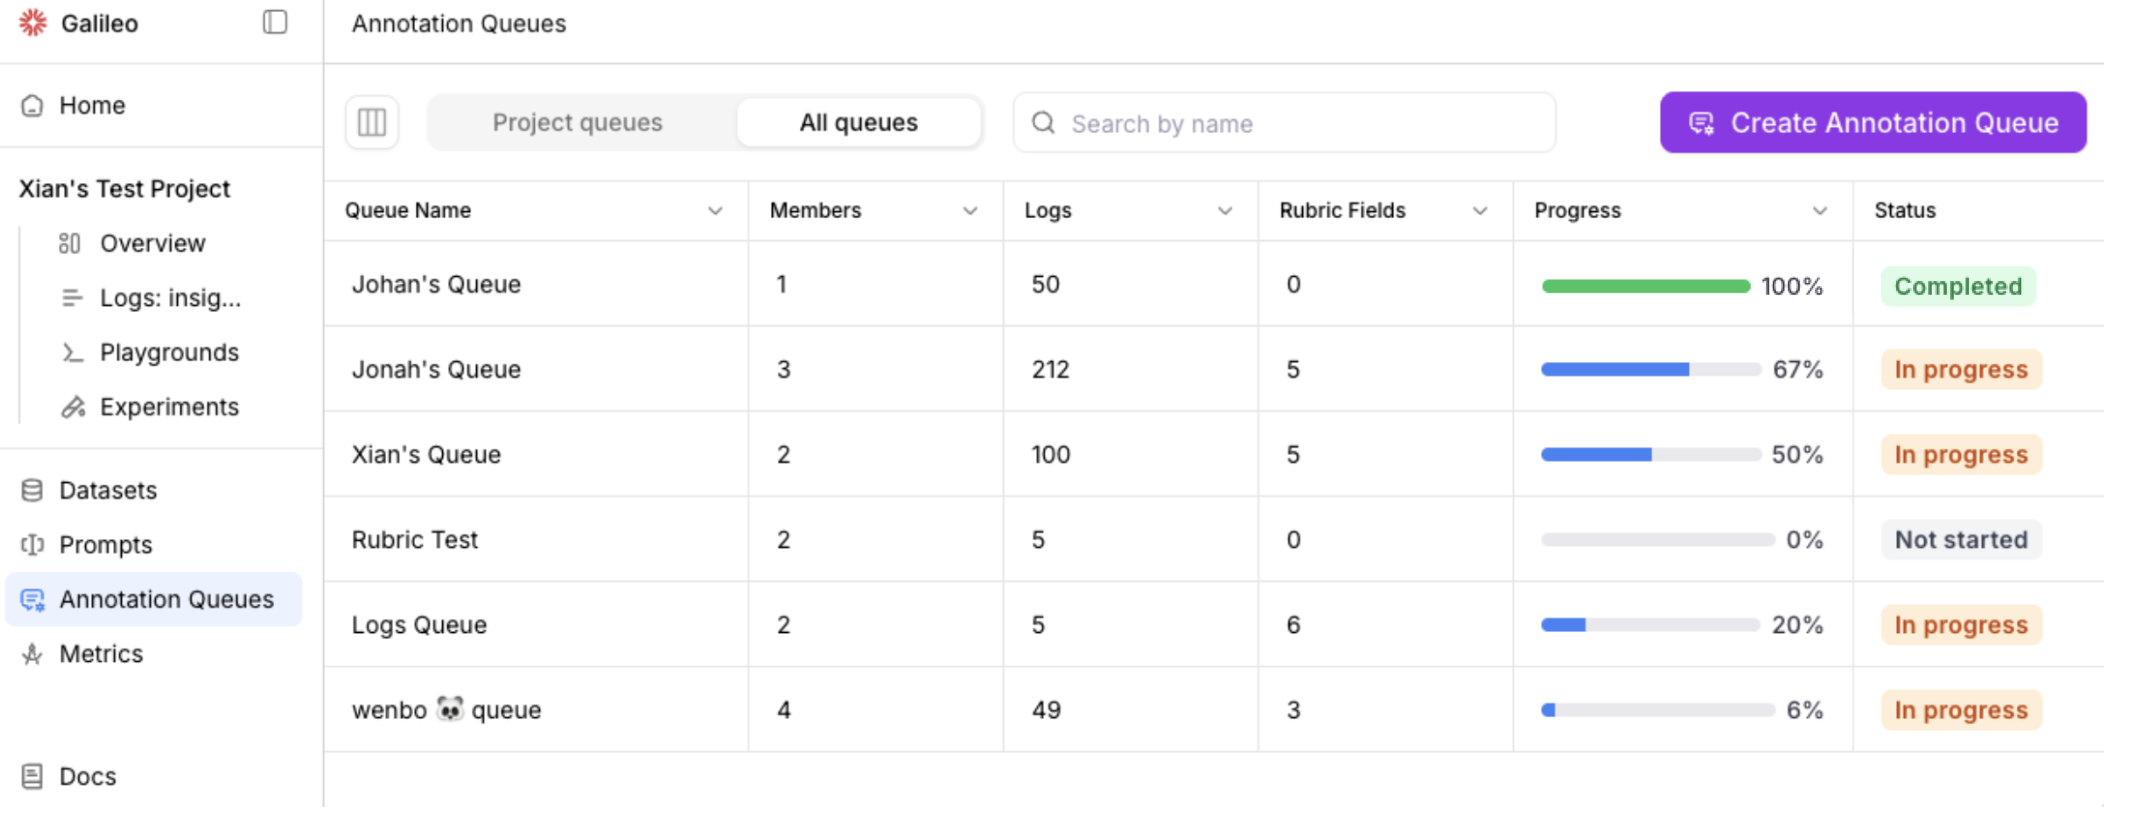
Annotation Queues (Enterprise Beta)
Galileo’s Annotation Queues enable teams to organize and scale human feedback by grouping project logs (sessions, traces, and spans) for structured review by subject-matter experts.